
CalTopo.com – A Beginners Guide
Table of Contents
What is it?
CalTopo.com is an incredibly useful tool for not only planning your next adventure but also aids in figuring out where and what the heck you saw after your trip is done. Despite its name, it offers much more than just topographical maps. There are layers for historical fire activity, buildings, cell coverage, and a very useful elevation/ slope angle tool. It also has the ability to export GPX Tracks that include elevation data for use in Google Maps or hand held GPS devices. This beginners guide to caltopo.com will help you navigate some of the basic functions of the software.
How do I find it?
CalTopo.com is available on your desktop/ Laptop, or also on the Google and Apple stores for your mobile device.
How do I use it?
CalTopo.com has many different features, and we’ve only just begun to explore some of them. Because of this we’ll cover some of the things that we use on nearly every trip that we plan but it is by no means an exhaustive guide.
Map Layers
The first thing that we noticed about CalTopo.com was the various map layers available. the CalTopo.com website provides proper descriptions of all of their layers here.
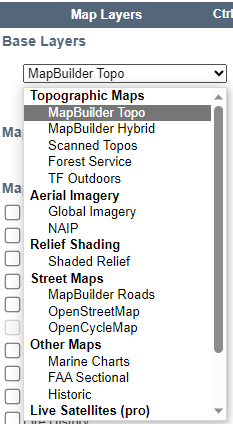
At the top right corner of the window you’ll see a drop down where you can select which map you would like to view. We primarily use three of the layers: MapBuilder Topo, Forest Service, and NAIP for satellite view.
MapBuilder Topo
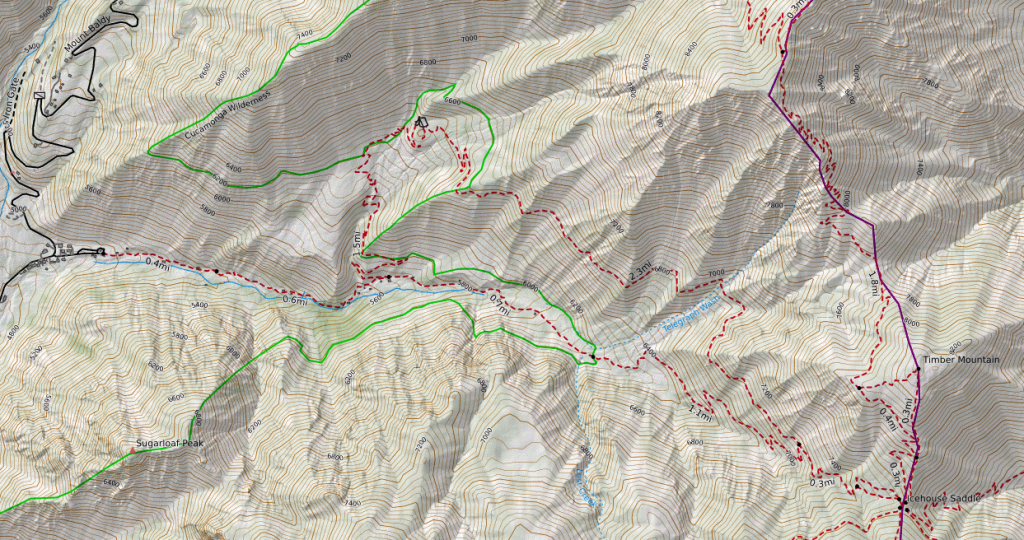
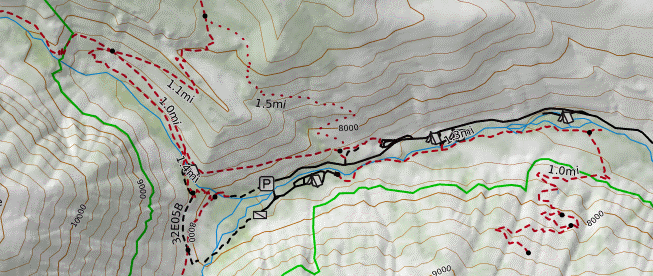
The MapBuilder Topo map is the most useful when planning a trip because it shows not only the Trails with distances, but also Contour lines, wilderness boundaries, and established camp areas.
Forest Service
When selected, the forest service map may have sub options.
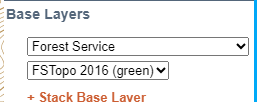
This will allow you to select the year and type of map that you want to view. These map choices will change as you move to different locations.
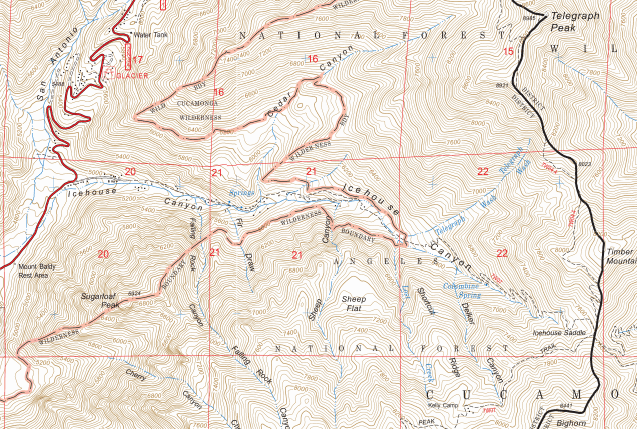
We find the Forest Service map more useful sometimes when looking for information about Springs or water sources. Also there are generally more labels for the different canyons and peaks compared to what is seen on the standard MapBuilder layer.
NAIP
We go back and forth between the Global Imagery layer and the NAIP layer. Neither seems to give as good of resolution as google earth, but they both do the job. The NAIP layer is only available for the continental US and the images are only taken during the summer months.
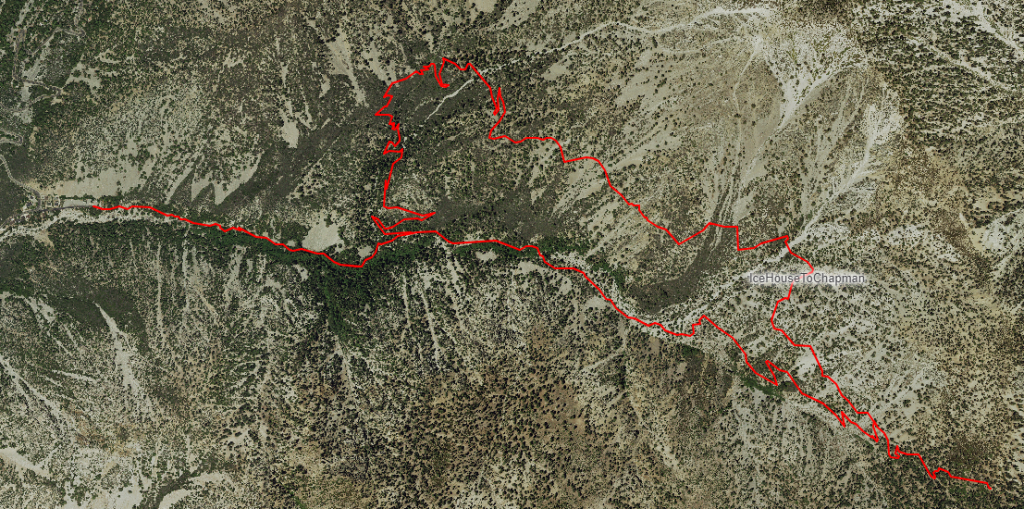
We tend to lean toward the NAIP layer as it seems to have a bit more sharpness. Also with the NAIP layer, you can use the False Color IR filter, which will highlight all of the plant growth in red.
Trip Planning
Finding Trails
CalTopo.com isn’t going to be the greatest tool to “search” with. You will need to have a fairly good idea of what area/ Trail that you want to go on. It does have a search function, but we haven’t been able to get it to reliably put us in the right location.
Determining Distances
There’s at least two different ways that you can determine the length of the route that you plan to take. The first and simplest is to add up the mileage markers along the trail.
This works pretty well as long as you want your mileage in miles. If you want your distance in kilometers you will have to take the second approach.
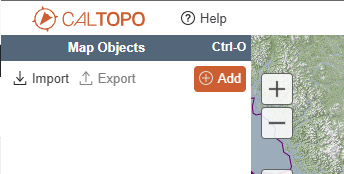
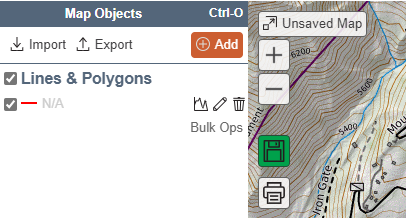
First, position the map to where you can see the starting point for your trek. Then, in the block on the left side of the screen, click the orange “+Add” button.
Note: if you arrived at CalTopo.com via one of the links in this blog, you will need to just go to Caltopo.com in order to perform these tasks. You will be in “read” mode from the link you followed.

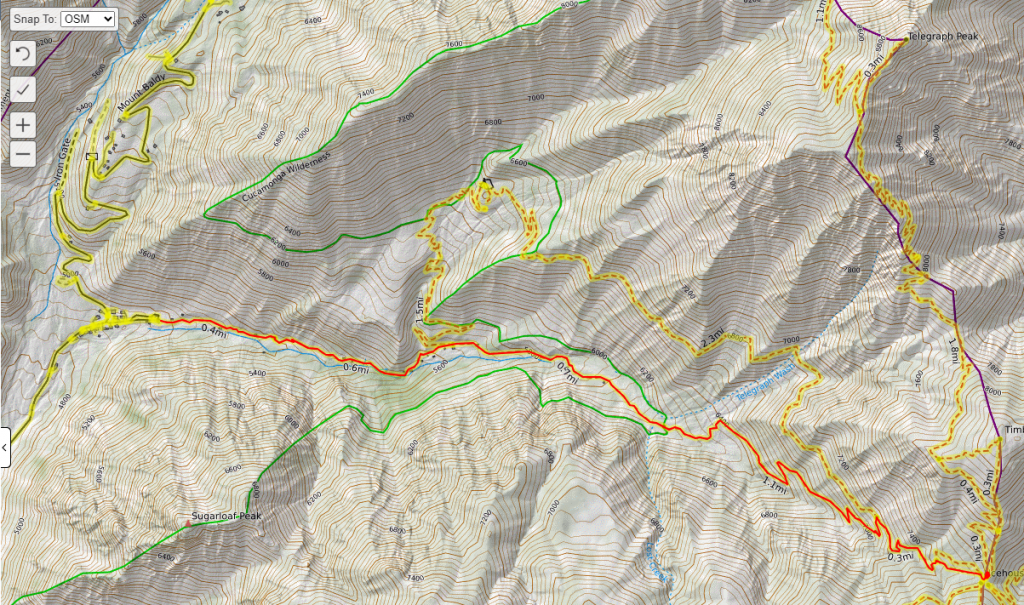
From the drop down menu, select “Line“. You may notice that all of the roads and established trails are now highlighted in yellow. As you move your mouse along the pathThis indicates that your “line” can auto-follow the selected path.
Click on your starting point and, if following a trail or road, click the ending location. There are times when the auto-follow decides to take an alternate route (or maybe you do!). If this is the case, then click closer to where the route deviates to “force” the line to go the correct direction.
If you make a mistake, click the circle arrow in the top left of the map to undo the last action. Once your route is complete, click the Check mark in the top left corner of the map to end.
If you are not logged in already, you will be prompted to do so. This is completely optional but logging in will allow you to save your routes for later use.
After clicking the check mark you should then see an entry for your line in the left hand block near the top.
Click the Pencil Icon to edit the name of it. The edit field will show up on the bottom right of the map. Here you can name the route and add any comments to help in identification later
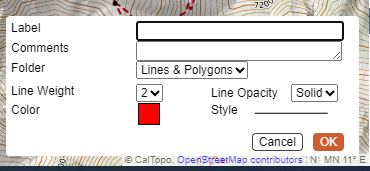
The Label field shown above is where the name comes from in the left pane of the map.
Viewing Elevation Change
CalTopo.com has the ability to give both elevation change information as well as gives a visual representation of the slope angle. This is very useful when deciding what the daily mileage might be achieved due to elevation gain.
To see the elevation information, click the button that looks like an elevation profile next to the newly created line. This will bring it up at the bottom of the screen.

This is good information, but it can get better, from here click the “expand” link at the top right.
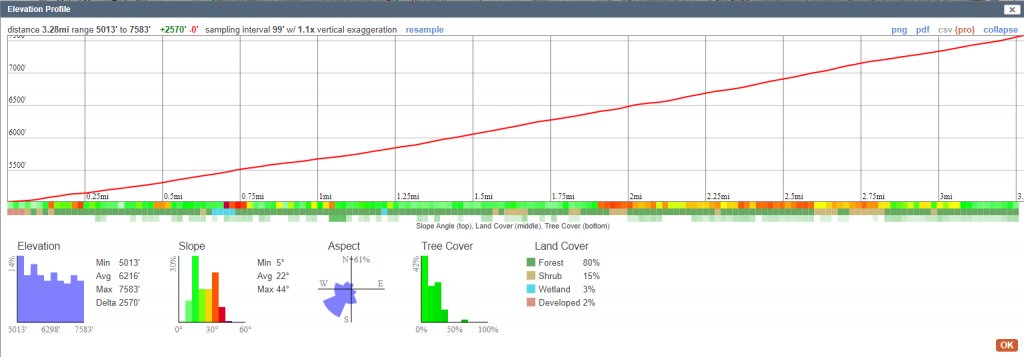
That will display the detailed elevation information, including color coded slope angles. It also includes tree cover information.
Sharing
Sharing your trip from CalTopo.com is easy. In order to do so though, you must be logged in. To start, click the save button on the left side of the map. If not logged in, you will be prompted to do so.
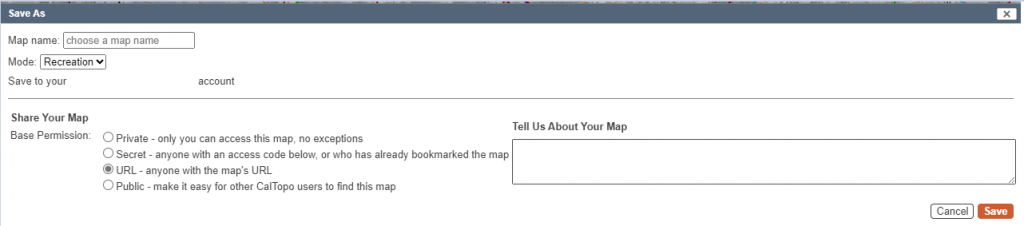
A box will appear where it asks for the name of the map and the map type. It also has options for what privacy settings you want. For the free version of you can only have 5 maps that are not “public”
Above is a shared map created for hiking the Icehouse Canyon Trail.
Exporting GPX tracks
Route details can also be exported from CalTopo.com for use on portable GPS devices, or other applications. To do this click the “Export” button.

There’s several options for exporting data, including .kml and GPX.
One Comment